Saturday, June 29, 2013

Raid on Orktebbe! (6mm FUBAR Battle Report)

Last Thursday Greg, Indo and Dave V. came by for the game. Greg had come up with a scenario - rules were the excellent one-page "FUBAR" SF skirmish set, scale was 6mm (!), the game would continue the loose narrative campaign that we'd been creating.

Greg had proposed the title "Raid on Orktebbe" and that got my imagination fired up... it had to be the Spooky Corporate Mercenaries making a daring raid on an Ork-held spaceport facility! The SCM's rolled in with three squads of five models, led by a "senior vice-president". Each squad had an RPG in addition to assault rifles and the squad leader's LMG.

SCM leader
 
Here's the Orks - there was a ton of them - mostly boyz, but led by a scary tooled-up leader and accompanied by a Killa Kan. Indo and DaveV. ran these guys and I took my SCMs.

The Boyz squads were salted with heavy weapons too.

Scary Ork boss
 
Here's the table layout. The Orks had hijacked the camo-painted aircraft sitting on the runway, and the SCM's were tasked with recovering some indeterminate item of value from the plane. One SCM trooper would need to spend a turn next to the aircraft to make the grab, then get off his home table edge, all in the 10-turn limit.

Satellite image - two squads of SCMs and their leader deployed at bottom, and the other squad was dropped at the middle top.

Here's the Ork deployment around the objective.
 
SCms advance to cover behind the Ork interceptors, and exchange fire with the Killa Kan (middle top beside the explosion marker).

And KABOOM! - concentrated SCM fire power blows up the Kan.

More Orks rush towards the fighting, including "The Boss".

Boss and boyz get stuck into close combat - due to some appalling die rolling by me, this spelled the end of the SCM squad.

 On the other table edge the SCMs were making good progress...

I guess it was about Turn 5 or 6 that the first SCM trooper reached the objective. Unfortunately the Orks arrived just after and close combat ensued, not all to the SCMs' favour.
 
However, after a bloody combat the SCMs got things under control and withdrew with haste towards their table edge. The three models at bottom are carrying the objective item, the five at upper left are running interference from the remaining Orks. Note Ork lone-nut assassin at centre right, the only survivor of his squad.

A brief pause to obliterate the lone-nut assassin!

With a comprehensive explosion! (I think the SCMs scored something like 10 hits on him in one round of shooting)

Everything appeared to be well in hand for the SCMs and they were withdrawing in good order with all Orks outside charge range. However Dave V. and Indo surprised with a bold move - running all remaining Orks up at full speed, gambling that they would win Initiative.

The first three SCMs made it to dust-off - mission accomplished.

But it was close!

THIS close!

What an exciting game. FUBAR is a great little system, and we've made a few tweaks to make it run a bit more to our liking. One of them is the "free activation" that can be used once each turn even if the die roll fails. Speeds the game along and keeps lips from getting too pouty (speaking for myself). I love playing with these li'l individual 6mm guys and I think the game looks really cool. Thanks to Greg for running it and to the guys for coming out! 

Thursday, June 27, 2013

Cold War Russians - 15mm

The west is doomed...or just a former Soviet republic...you know, whatever comes up for the gaming table
Another fun 15mm diversion!  A few weeks ago our friend Mike F posted some pictures of a budding modern project.  Of course I like to encourage new projects here among our group, so when Mike sent me a note asking if I had any 15mm Russians for Cold-War-Gone-Hot type games, I promised right away to come up with some - after all, I had been thinking about just this kind of thing as my own 15mm Golan Heights project had gone ahead and is pretty much finished now (in as much as anything is ever "finished" for me).

Motor rifle squad - the officer (pointing) is Peter Pig - the balance are from the new Eureka line
These infantry are the (still relatively) new Eureka 15mm modern Russians, with a few Peter Pig figures thrown in.  The vehicles are all QRF castings.

Another motor rifle squad
Squad number three
The Eureka Russians are amazing.  Just awesome sculpts, easily on par with Peter Pig and some of the flat-out best 15mm castings out there. They are part of a range intended to represent the Russian army at the time of the first intervention in Chechnya (and there is a range of Russian troops wearing those awful and ridiculous-looking sphere-shaped helmets if that is your thing) as well as some Chechen rebels.  I think in terms of equipment they fit anywhere from the late 1980s into the mid 1990s - or even later.

BMP-2D from QRF - a really nice model (and a very cool variant of the BMP)
I painted the infantry in a sort-of-woodland camo that I have seen on Tim Rich's figures.  Of course, his paint job is WAY nicer, but it's still fun to try to copy the best.

BMP-2 - detail is softer on these
The only knock I would have on the Eureka range is that it lacks an ATGM set - a touch disappointing considering how amazingly complete the range is otherwise.  You have AK-74s, AK-74s with grenade launchers under the barrel, LMGs, RPG-7s, the little RPGs that look like LAW rockets, heavy MGs, automatic grenade launchers and mortars.  Wow.

Officer on the left is Eureka, the medic on the right is Peter Pig

Two Russian marksmen - Eureka castings
The other knock I would have gently put to Eureka is the shipping - they go cheap (which is great when you're paying), but I lost three LMG troops with broken weapons thanks to the sloppy packing, which kind of sucks.

Heavy weapons to support the troops
I bodged an AT-4 missile team using an AT-4 missile set from QRF, a spare Eureka grenade launcher crewman and spare Peter Pig heavy weapon crewman.

Automatic grenade launcher - a problem solver on a tripod

AT-4 ATGM team - missile from QRF, crew on right from Eureka, on left from Peter Pig

A motor rifle platoon ready for the attack
The infantry are supported by a smattering of vehicles painted, once again, in a poor copy of a Tim Rich cammo pattern known as "Fulda", a three-tone scheme seen on many Russian AFVs at the time of the fall of the Berlin wall.  I'm not sure how widely used it was, but it looks neat, and I was tired of painting Russian stuff just plain green.

T-80BVs from QRF, infantry from Eureka
The vehicles are QRF castings.  As always with QRF the casting quality is hit-and-miss.  The tanks are T-80BVs, and I have to give QRF credit as being the ONLY one out there offering these vehicles.  They had lots of flash, needed a LOT of drilling and fixing, and each had only left-side track sets.  But in the end they painted up pretty well, and I'm happy with how they turned out.  You can't notice the track SNAFU very much with the weathering etc. I think QRF has re-workd the molds on these models, which would be great, as I ordered several more to round out the force :)

The T-80BV makes use of reactive armour
The APCs are a mix of two BMP-2s and a BMP-2D. The BMP-2s were not too bad casting wise, but the detail was soft and the track assemblies very soft.  The 30mm cannon on the turret was also very thin and I worry they will break before long. On the plus side, as with the tanks, you hardly notice flaws in the tracks once the vehicles are based and weathered.

Are those road wheels on the right side? :) Add more mud...
In contrast, the BMP-2D - an up-armoured model of the BMP-2 with applique plates on the turret and sides - is a top-notch casting.  Super clean, really durable, lots of clean detail, top notch.  And once again, as far as I can tell, QRF is the only company taking the trouble to offer this vehicle.  I have ordered a couple more of these suckers as well.

Another view showing the ERA "bricks" on the turret and hull
Overall the force represents (very roughly) a motor rifle platoon and heavy weapon platoon.  There are three seven-man squads, each with an RPG-7 and LMG, a small command element of an officer and a medic, two dudes with sniper rifles, two heavy MG teams, an AT-4 missile team, a mortar team and a grenade launcher team.

Ready for the advance! Is that a Leopard C-2 over there?

So Mike - over to you....I'm sure you have more than a solitary M113 lurking to defend the NATO lines...I'm looking forward to battle with the Canadians in the Fulda Gap!

Monday, June 24, 2013

Bolt Action Battle Report - Home Guard in Action

Conscripts Bill, Greg and Mike F. talk strategy
Last Thursday I rolled out the terrain table for a small Bolt Action game. The scenario was set after a fictional German invasion of Britain, and pitted Veteran German Fallschirmjager against Inexperienced British Home Guard with some Veteran Commando backup.
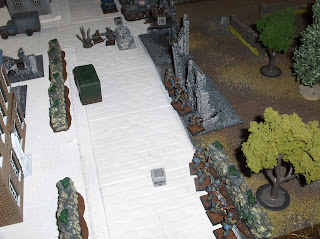
In a bit of a twist on the usual trope, the Germans were defending the outskirts of a village and the British were on the attack. The British objective was to get units into the German deployment zone or off their table edge. The Germans deployed their force (two sections of paras, HQ section, two medium machinegun teams, and a 37mm PaK gun) on the white pavement. They left a Pzkpfw 38(t) in reserve.

The British brought their whole force on in one wave. From bottom left to right: Home Guard section, HG Vickers team, two Universal Carriers each loaded with half of the Commando section, two-pounder AT gun, HG headquarters, another HG section, an M5 Stuart tank, and a Daimler scout car.  
The Fallschirmjager lie in wait...
Machineguns ready to go...
British troops advance into the churchyard.
Scout car rolls forward on a very scout-y mission.
HG section enters the ruined church where they would be pinned by MG fire for most of the game. Commandos in carriers roll forward.


On the other flank, an HG section occupies the ruined farmhouse as tank advances.
The Germans called in their armoured reserve early.


British advance rapidly on their left flank.


Stalwart Germans stand ready to receive the assault. MG is just visible at centre to on second floor of ruin, with order die.
The Commandos jump out of their transports ready to assault the German defenders. It was some heavy veteran-on-veteran action but the British prevailed and the defenders were wiped out.
After trading a few shots with the British tank the 38(t) was knocked out.


Commandos occupy the ruins (bottom) while Carriers jockey for an angle to enter the town. The German 37mm AT gun was on "Ambush" watching the gap, but the Brits had a cunning plan...
The remaining Commandos ran into the street and engaged the AT gun with fire while one Carrier outflanked it. The AT gun was destroyed and the Carriers rolled in unmolested. Remnants of HG section from the church follow up (bottom).
Victorious British armour rolls up the road. I generally like Bolt Action but for some reason this scenario worked out a bit one-sided (and I even remembered to apply the preliminary bombardment!)... points were balanced but maybe the dice just didn't fall for the Germans that night. Final VP tally was something like 11-2 for the British. Greg had suggested that the game might've worked better with our house "Blitzkrieg" rules and so I might set it up again later this year to test his theory. Fun game though!